 Canadian Dollar
 US Dollar

Are you tired of your traditional staircase designs or dreaming of installing the best railing systems on your next DIY railing project but feeling overwhelmed by the many options available? Fear not! In this comprehensive guide, TAG Hardware provides all the essential information to select the perfect railing system for your DIY endeavour. From understanding design theory to navigating building codes, material selection, and installation methods, we've got you covered.
Understanding Design Theory in Railing Systems:
Before diving into the selection process, it's crucial to grasp the fundamentals of design theory in railing systems. Consider factors such as architectural style, aesthetic preferences, and functionality to ensure your railing seamlessly integrates with your overall design scheme.
Building Codes and Regulations:
One of the most critical aspects of any railing project is compliance with building codes and regulations. Familiarize yourself with local codes regarding height, spacing, and material requirements to ensure your railing meets safety standards.
Material Selection:
One of the most critical aspects of your project is selecting the right materials and ensuring you have the necessary tools to bring your vision to life. In this comprehensive guide, we'll walk you through the process of material selection and highlight the essential tools required for your DIY railing system.
Material Selection:
- 1.Stainless Steel: Known for its durability, corrosion resistance, and modern aesthetic, stainless steel is a popular choice for railing systems. Consider grades such as 304 or 316 for optimal performance in outdoor and coastal environments.
- 2.Wood: Wood railing systems offer warmth, natural beauty, and versatility in design. Choose from a variety of wood species such as cedar, redwood, or pressure-treated pine, depending on your desired look and budget.
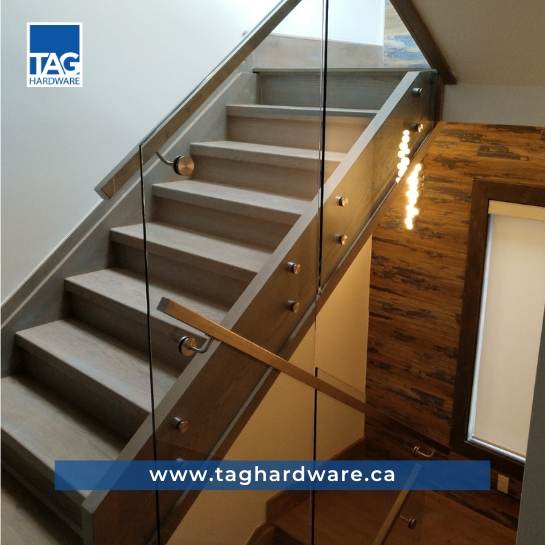
- 3.Glass: Glass railing systems provide unobstructed views, modern elegance, and a sense of openness to your space. Tempered or laminated glass panels are commonly used for safety and durability.
- 4.Aluminum: Lightweight, durable, and low-maintenance, aluminum railing systems are an excellent choice for both residential and commercial applications. Powder-coated finishes offer customizable color options and added protection against the elements.
- 5.Composite: Composite railing systems combine the natural look of wood with the durability of synthetic materials. They are resistant to rot, decay, and insects, making them an ideal choice for outdoor railing projects.
Tools Required:
- 1.Measuring Tape: Accurate measurements are essential for ensuring proper fit and alignment of railing components. Invest in a quality measuring tape for precise measurements.
- 2.Level: A level is necessary for ensuring your railing is installed straight and plumb. Both a standard bubble level and a laser level can be useful for different stages of the installation process.
- 3.Drill and Drill Bits: A power drill and a set of drill bits are essential for creating holes for fasteners and anchors during installation. Ensure you have the appropriate drill bits for the materials you're working with.
- 4.Saw: Depending on the material you choose for your railing system, you may need a saw for cutting rails, posts, or balusters to size. Options include a circular saw, miter saw, or reciprocating saw.
- 5.Screwdriver or Impact Driver: A screwdriver or impact driver is needed for driving screws and fasteners into place. Consider using a cordless model for ease of use and maneuverability.
- 6.Wrenches: Adjustable wrenches or socket wrenches are necessary for tightening nuts and bolts during assembly. Ensure you have the appropriate sizes for your railing hardware.
- 7.Safety Gear: Safety goggles, gloves, and hearing protection are essential for protecting yourself during the railing installation process. Additionally, consider wearing a dust mask when cutting materials to minimize exposure to dust and debris.
Carefully select the right materials and make sure you have the necessary tools so you can tackle your DIY railing project with confidence and success. Whether you opt for stainless steel, wood, glass, aluminum, or composite materials, choose high-quality products that meet your aesthetic preferences, performance requirements, and budget constraints. With the right tools and materials at your disposal, you'll be well on your way to creating a stunning and functional railing system that enhances your space for years to come.
Design and Style:
Railing design can significantly impact the overall look and feel of your space. Explore various design options, from sleek and minimalist to ornate and traditional, to find the perfect style that suits your taste and complements your home or project.
Installation Methods and Support Guide:
Understanding the installation process is essential for a successful DIY project. Consider the complexity of installation methods and ensure you have the necessary tools and support to complete the job safely and efficiently. Installing a railing system is a crucial step in any DIY project, ensuring safety, stability, and functionality. Let us walk you through the various installation methods and support options to help you complete your railing project with confidence and ease.
1. Pre-Installation Preparation:
Before beginning the installation process, it's essential to gather all necessary tools and materials. Review the manufacturer's instructions carefully and ensure you have a clear understanding of the installation steps involved.
2. Selection of Installation Method:
There are several installation methods available for railing systems, each suitable for different applications and structural requirements:
- Surface Mounting: In surface mounting, the railing is attached directly to the surface of the deck, balcony, or staircase using mounting brackets or screws. This method is ideal for concrete or wooden surfaces where drilling is possible.
- Fascia Mounting: Fascia mounting involves attaching the railing to the side of a supporting structure, such as a wall or fascia board. This method provides a clean and streamlined look, with the railing appearing to float against the surface.
- Post Mounting: Post-mounting involves securing railing posts directly into the ground or a concrete surface using anchor bolts or concrete anchors. This method is commonly used for outdoor railings and provides excellent stability and support.
3. Support Guide for Different Railing Systems:
Depending on the type of railing system you're installing, various support options may be available to ensure proper alignment, stability, and structural integrity:
- Handrail Attachments: Handrail attachments are used to secure handrails to posts or walls, providing support and stability along the railing system's length. Choose from a variety of handrail brackets and attachments to suit your design preferences and installation requirements.
- Wall Mount Brackets: Wall mount brackets are used to attach railing sections directly to the wall, providing additional support and stability. These brackets are available in various sizes and designs to accommodate different railing styles and materials.
- Glass Mount Brackets: Glass mount brackets are specifically designed for glass railing systems, providing a secure attachment point for glass panels. These brackets come in different configurations, such as surface-mounted or fascia-mounted, to suit your installation needs.
- Disc Flanges & Disc Covers: Disc flanges and covers are used to conceal mounting hardware and provide a finished look to railing posts. These accessories add a decorative element to your railing system while ensuring a clean and polished appearance.
4. Installation Process:
Once you've selected the appropriate installation method and support options, follow these general steps for installing a railing system:
- Measure and mark the installation locations for posts, brackets, and other support components.
- Drill pilot holes as needed and secure mounting hardware using screws or anchors.
- Attach railing sections or glass panels to the support components, ensuring proper alignment and spacing.
- Check for level and plumb throughout the installation process, making any necessary adjustments to ensure a straight and secure railing system.
- Secure handrails, end caps, and other finishing touches to complete the installation.
5. Final Inspection and Maintenance:
After completing the installation, conduct a final inspection to ensure the railing system is properly installed and meets safety standards. Regular maintenance, such as cleaning and tightening hardware, is essential to ensure the long-term performance and durability of your railing system.
By following these installation methods and support guides, you can successfully install a railing system that enhances the safety, functionality, and aesthetics of your space. For specific installation instructions and product recommendations, consult TAG Hardware's customer support team or seek assistance from a professional installer.
Customization Options:
Personalize your railing system with customization options such as custom post designs, LED lights, and decorative accents. Tailor your railing to fit your unique aesthetic preferences and create a one-of-a-kind look for your space.
Accessibility:
For projects requiring accessibility features, choose railing systems that comply with ADA (Americans with Disabilities Act) standards. Ensure proper handrail height, smooth transitions, and adequate support for users with mobility challenges.
Maintenance Requirements:
Consider the maintenance needs of your chosen railing material. Opt for low-maintenance options if you prefer minimal upkeep or be prepared to invest time and effort into regular maintenance for materials such as wood or wrought iron.
Budget:
Establish a budget for your railing project and prioritize features and materials accordingly. Balance cost considerations with quality and durability to achieve the best value for your investment.
Warranty and Customer Support:
Choose railing systems backed by reliable warranties and excellent customer support. Ensure that your investment is protected, and assistance is available should you encounter any issues.
End Thoughts:
With this comprehensive guide, you're now equipped with the knowledge and resources to select the perfect railing system for your DIY project. Explore TAG Hardware's extensive range of railing products and accessories, including templates, cap rails, LED lights, glass clamps, gate systems, and more. Elevate your space with a stylish and functional railing system that reflects your unique style and meets your safety needs.
Note: For detailed product specifications and assistance with your railing project, visit TAG Hardware's website or contact our customer support team for personalized guidance. Let's turn your railing vision into reality together!
Visit: www.taghardware.caor call for sales inquiries: 905-760-2000 or write us to sales@taghardware.ca and salesoakville@tagglasssolution.com